Search This Blog

Showing posts with label dessert. Show all posts

Tuesday, January 24, 2012

What You've All Been Waiting For: Recipes!

My vegan diet has me eating a lot of the same foods. I just love the B.A.T's (bacon, avocado, tomato) so much though that I don't mind at all. I did want to try a new vehicle for the filling though and had been eyeing a recipe in one of my newer Taste of Home magazines for Homemade Tortillas.

Here's the recipe:

Homemade Tortillas

2 cups all-purpose flour
1/2 tsp salt
1 cup water
3 Tbsp olive oil

In a large bowl, combine flour and salt. Stir in water and oil. Turn onto a floured surface; knead 5-6 times. Divide dough into 8 portions. On a lightly floured surface, roll each portion into a 7" circle.
In a large non-stick skillet coated with cooking spray, cook tortillas over medium heat for 1 minute on each side, until lightly browned.
You can stack these on a plate under a clean slightly damp kitchen towel as you make the whole batch.

I made the dough and divided it into 8 portions. C rolled them out and cooked them for me because I was starting to get frustrated with the dough sticking to the counter.
They turned out sooo tasty! These tortillas made awesome B.A.T's.
bacon, avocado, tomatoe
 While the sandwich would have likely been enough for a light meal, I felt like having something more with the sammie. How about a steaming bowl of lentil soup?
lentil soup and sammie
 This is the best lentil soup EVER. It might actually be just one of the best soups ever. Period. The recipe is actually called "Lentil Soup You'll Absolutely Love. Trust Me." I don't remember where I found the recipe but it was on a blog somewhere. We gave a copy of this recipe to the chef at Terrace 55 so that he could make it for the appetizer at our wedding. They came served in shooter glasses with a breadstick straw. So cute!
Because I love you guys so much, I am going to share this much coveted recipe. My copy is crinkly, worn, stained, and well-used. Don't be intimidated by the long list of ingredients. This is an easy recipe and it makes a lot. This soup can be frozen. Make sure you have an immersion blender and a large pot. You could use a blender to puree this in batches, but my preference is the immersion blender. Much easier and cleaner.

Please enjoy this and serve it to those people you really care about.
Healthy, easy, wholesome, and perfect for when you need a warm hug.

Lentil Soup You'll Absolutely Love. Trust Me.

2 Tbsp olive oil
1 large onion, chopped
1 tsp salt
5-6 large carrots, peeled (if not organic), and sliced
3 cloves garlic or 1 Tbsp chopped garlic in oil
1 Tbsp dried thyme (or 3-4 sprigs fresh)
1 - 14oz can Aylmer Accents Spicy Red Pepper tomatoes
1 cup red lentils, dried
cracked black pepper, to taste
1/2 cup dry white wine (or water or stock to make non-alcoholic)
4 cups vegetable or chicken stock (vegetable to make it vegan)
1 cup water (if you want to add 1 cup wine and 1/2 cup water, that works)
1-1/2 tsp balsamic vinegar, or a splash

Pour oil into a large pot set over medium heat. Add in onions and a generous pinch of salt. Saute for a minute or 2 and add in carrots. Cook about 5 minutes. Stir in garlic and cook for a minute more, stirring frequently to prevent burning. Add in thyme, tomatoes, lentils, salt and pepper. Stir. Reduce heat to low, cover, and cook for 10 minutes. Retrieve any thyme stems if using fresh.

Pour in wine, stock, and water. Increase heat to medium. Cover partially and let simmer for about 30 minutes, until onions are tender. Use an immersion blender and puree the soup until smooth. Add in vinegar and stir. Serve or cool and freeze.
Enjoy!!

I have served this with chopped sauteed kielbasa and crimini mushroom dumped into each bowl and a crisp piece of ciabbatta on the side. Add a salad and you have a perfect meal.
red lentil soup
 The only difference between my workday breakfasts and my weekend breakfasts is the freshly ground coffee. 1 cup of dry oats, with boiling water poured over top. My breakfast almost everyday lately, which I love! My mom bought me a vegan ice cream making book for Christmas so I have been engrossed in the colourful tasty looking recipes many afternoons and evenings. My mom has a big pot of fresh rosemary (so jealous!) and she generously gave me a small ziplock full of the enticingly fragrant stems.
This photos shows how I like to start my day.
oats and coffee
 I found a recipe for quinoa veggie burgers online so figured that since I had all of the ingredients, that this would be an easy dinner.
organic quinoa from Costco
 I followed the instructions on how to cook up the grain and then got to work on the veggies. Onions, mushrooms, shredded zuchinni and carrots all into a bowl. The quinoa was supposed to act as a binder, along with some cornstarch and egg replacer. I made the mistake of adding those 2 ingredients together and they just clumped. Ugh! Whatever. On with the show. The shredded veggies took a while to do so I wasn't making a new batch.
shredded and chopped veggies
 With the burger filling done, I was going to deal with the chocolate craving that I was having. I had given my mom a call and she told me about some vegan pudding that she makes all the time! I thought that was very cool and since this would use up the half carton of silken tofu from the omelet disaster AND hopefully curb my dessert craving, I was excited to give it a whirl. Did I mention that this recipe sounded super simple?

Vegan Chocolate Pudding

1 lb silken tofu
1/3 cup cocoa powder
2-3 Tbsp maple syrup
1 tsp vanilla extract

Blend all ingredients in a food processor, scrapping down the sides often, ensuring that the mixture is smooth. Spoon into serving cups and cover and refrigerate until ready to serve.
vegan pudding ingredients
 Wow. This pudding is so simple and so tasty I will never buy Jello pudding again! Since you can substitute 3 Tbsp of melted chocolate for the cocoa powder, you could change up the flavour of the pudding if you like. White chocolate and orange extract, using agave syrup instead of maple, and you have a new pudding flavour! Go now and try this!
dark chocolate pudding
 With dessert in the fridge, I figured I should start on the burgers. With my screw-up with my egg replacer, these did not hold together well at all. We basically ended up just sautee-ing the mix.
quinoa and veggie burger
 Served with peas and roasted beets, and we have a meal. Ta-da! Despite how they looked, the burgers (or quinoa and veggie fry) was surprisingly tasty. I would make these again and be more careful with the recipe.
another vegan dinner
 I didn't feel like cooking the other night so decided to make something super easy. Cooked red lentils with reduced sodium taco seasoning added to it. Served warm over chopped iceberg lettuce, tomatoes, and black olives and I had my quick and filling dinner for one.
lentil taco filling
 I needed an easy dinner because I had a lot of food packing to do. I was driving to Kenora Thursday morning to spend the next 2 days there working on their showroom. I would be helping to re-merchandise everything and make it look fresh and organized. Since I was still eating vegan, it was going to be really tough to eat out, so I wanted to be sure that I had enough food for my breakfasts, lunches, dinners, and snacks packed with me. I made sure to have enough for 2 B.A.T sandwiches, fresh veg, raw nuts, water, fruit. The weather was cold and I left early in the morning with my fresh ground coffee, a giant bowl of oatmeal, food for the trip, my work laptop, clothes, my briefcase, and off I went.

Friday, September 23, 2011

The Happy Anniversary

Deep breath. Mmmm, ahhh! Finally, a free evening that didn't begin at 10pm. Gym-ed, showered, fed and rested, I can catch up on my blogging! So many events have been attended, delicious food has been cooked and eaten, and many friends and family have been visited. I promise, now, I will catch everyone up on what's been going on.

The wedding anniversary of my in-laws went uncelebrated this year following some sad family news. My mother-in-law seemed pretty down since she felt that their special day would now hold only the sad memory of loss. The idea of that really upset me so I came up with a plan. While doing laundry at my in-laws (while they were at the cabin), I ran and idea by C's aunt and cousin: an anniversary surprise party! We decided to host the party that weekend. They were due to arrive back home from the lake on Saturday, so we planned the party for Sunday. I would invite them over for dinner, just the 4 of us. We split up the cooking and started working on the party.

I had promised C's dad that when I had them over for dinner that I would make ice cream for dessert: his choice. He picked chocolate. "Would you like anything in it? Chopped chocolate? Nuts? Marshmallows? Candy?", I asked hopefully (I'm a big fan of delicious chunks of goodies in my ice cream). "Nope, just chocolate" he replied. So, as per my hubby's Pop's request, chocolate it would be! David L's recipe looked amazing and his description of him licking the beaters clean, fresh after churning, sold me. I picked up the cream, whole milk, and chocolate from the grocery store and got to work!

First things first, heat the milk and some of the cream with sugar and cocoa powder.
Step 1 of chocolate ice cream making
While the first part of the base is cooling, we start the next part of the chocolate base. Time to melt some more chocolate! We can't have too much of that in an ice cream. Look at that smooth rich chocolaty goodness. Mmm, I could stop the process here and just drink this part of the base, but then, no ice cream for my father-in-law.

Stage 2 of the base
Now, what could we add to this to make it even more rich and creamy? Hmm. Righty-o, the rest of the cream. Seriously, I am going to have to start going to Boot Camps if this ice cream making keeps up.

Cream to the base

That's right. Allll the cream...
 By now, all of you are all old pros at tempering the eggs into the hot liquid, so I don't need to go over that process with you. The eggs, now brought to temperature, can be added to the rest of the base. 
Egg mixture being added, to thicken the base
After about 30 minutes in the frozen drum of the ice cream maker and out comes the most divinely rich, smooth, creamy, and chocolaty ice cream I have ever made! Plain chocolate. Good choice.


Finished chocolate ice cream for the anniversary surprise party
Fast forward to Sunday. Despite my in-laws coming home from the lake 2 days earlier than planned, and C's aunt not realizing immediately that she was on speaker phone while talking about plans in front of C's mom, the surprise wasn't spoiled. Everyone arrived about 30 minutes early to prepare the house and lay out the food. We decided to have a BBQ since the weather was nice so there were crisp refreshing salads, burgers and wieners, grilled vegetables, and fruit, waiting to be served.
Burger and wiener fixings

More fixings and salads
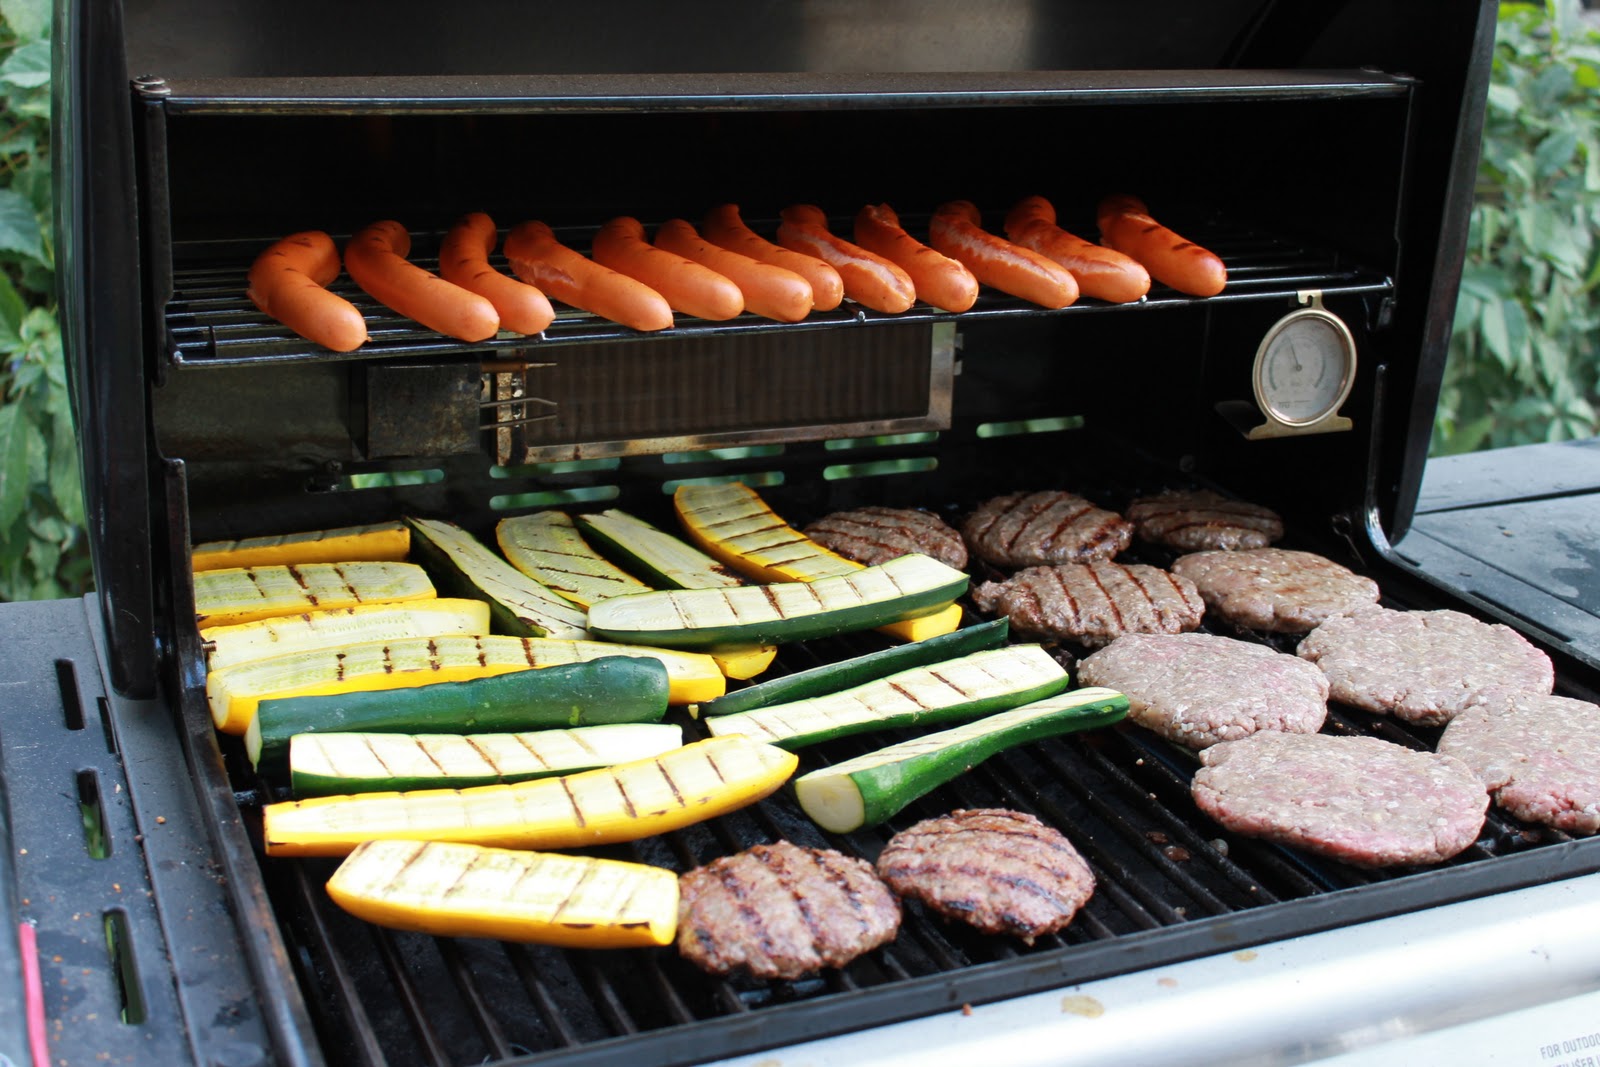
Now, my in-laws are not the kind to be late for anything, if anything, they are often early. Knowing this, I was frantically shoving family members into the hallway with a camera at 3 minutes before zero hour. After 10 minutes in the hallway and no sign of the happy couple, I decided to call them. A phone call to the house, each of their cell phones, and the house again with no answer. Finally, after much animated debate about what might be keeping them, the phone rang. They were running behind but were on their way. Everyone back in the hallway! When the arrived, I walked them in, everyone jumped out and the smiles, laughs and chatting began. They were late because they were buying an anniversary present for us! Now that the guests of honour had arrived, we got the BBQ fired up and started grilling. European wieners, homemade lean burger patties, and zucchini and yellow squash were tossed on. Let's not forget, this house is Pro-Veg so nobody gets away without having some.

Enjoying the summer sun with the grill
After dinner, the much anticipated dessert was brought out. My aunt-in-law made a lovely fruit cake covered in marzipan and fondant, decorated for their anniversary. We had them share in the duty of cutting the cake together, just like at a wedding. I have to say, it was adorable to watch and also very uplifting to see a couple, married for over 30 years and still so much in love.
The cake cutting
The cake was cut, dessert was served, and everyone hunkered down to some sweet treats to end the plentiful meal. The men congregated in the living room, sipping beers and chatting. The women traded stories in the kitchen, cleaning up the dishes and the leftovers. Yes, definitely a flash-back to different times, but there are still many traditional roles that spill to the surface after a party. Yawn. The party is done, it's getting late as I type this. My one post that was supposed to be many more is not to be tonight.
But fear not, faithful readers (if there are any of you out there), I will write more blog more this weekend.
So, goodnight faithful readers. Sleep well.

Moist sweet fruit cake

The dessert table: the chocolate ice cream, watermelon, chocolate cake, and fruit cake


Wednesday, August 24, 2011

The Perfect Party Cake (From Hell)

What a stressful and draining week. Saturday morning rolled around and I woke up relatively early with thoughts of cake baking on the brain. The ice cream was done for babcia's birthday, but I still had the daunting 4 layer Dorie cake to make. First things first though: Saturday morning breakfast! As previously mentioned, we have a mini-tradition here of doing pancakes or at least a larger breakfast together on Saturday morning that includes at least 3 components and a fresh pot of coffee. There is something very comforting and happy about knowing that at very least, for an hour in the morning (provided workers aren't coming over to drag mud through the house), I get to spend some quiet time with my husband, sometimes in our fuzzy robes even, enjoying a hearty hot and fresh breakfast together in a quiet house. Deep relaxed sigh. Just writing this makes me long for this Saturday morning to be here. Typically, as it goes, one of us is more tired and needs more rest that the other. It seems to alternate. Today, C really seemed to need sleep and I was more awake. So, I crept out of bed, cleaned the kitchen, and started preparing what I had already been thinking about for a few weeks: A B C pancakes. These pancakes are a warm and fuzzy memory from childhood. On Sunday mornings, my dad would always make a big breakfast for my brother and I, and one of his specialties, was ABC Pancakes. The batter is thinner than normal so that you can "write" with it on the griddle. Once the batter is mixed and rested, you just pour it into a food-grade squeeze bottle (I think mine is from Russell Foods) and go wild! I remember that one time, my dad attempted each my name and my brother's name, in cursive, and it was the most wonderful special pancake ever. EVER, I tell you! So, with this in mind, after the tough week, I knew the only breakfast to start the day out on a high note would be ABC Pancakes. They had the strength and power of nostalgia, whimsy, and tastiness backing them up.
We bought this griddle off Kijiji for $5 and it's not perfect (you can tell where the element runs and the middle doesn't cook as evenly as the outsides of the surface) but it works fine for what we're doing. I sprayed the first batch with PAM just to be sure and started out with C's first name. Easy!
ABC Pancakes go personal
The griddle was quite hot and the pancakes cooked fast! The batter turned out perfectly. I tasted one and the pancakes were delicate, soft, and just a bit sweet.

Golden brown deliciousness
Really, once you get the hang of using the bottle to squeeze out batter like paint, you can make any shape or design that you want. Just account for some slight spreading as the batter is thick so you'll need to use thin restrained lines if you are going with a lot of intricate detail. Some hearts were next, for my sleeping beauty (although, unshaven, grovelling morning voice and half shut eyes, maybe it should be beast, heehee)!

A little bit of breakfast love
Well, by golly, I was on a roll. So, with my dad's experience on my side, I attempted the grand finale, cursive names! They turned out beautifully and since these were my piece de resistance, I added some sausage and eggs to the griddle (for over easy), and went and woke up my hubby for some breakfast. The dripping of the coffee was done and the warm, rich aroma had filled the kitchen, along with the sweet smell of pancakes and saltiness of turkey sausage. If I could bottle this smell, I would wear it every day! I would call it "Lazy Saturday Breakfast", or maybe something more original.

The piece-de-resistance, almost ready to eat!
Although I was having a grand ol' time with my shapes and spirals and letters, C yelled to me from the couch to come sit down, so I finished off the batter with some quick squeezes. Silver dollar pancakes (I believe this recipe originate from the United States when there once was a silver dollar coin and these pancakes would have been the same size as those). It's my guess that this is what the recipe was originally for. I guess this shape is tasty too, but somehow my M's and hearts were the yummiest.

Silver dollar pancakes
 *   *   *
Ok, breakfast dishes were put away, the robe was traded for some shorts and a tank top, and it was time to get down to some serious business. We needed to leave by 2:15pm to get to my uncle's in Oakbank (a town not far outside of Winnipeg) in time for the scheduled time of 3pm for my grandma's 80th birthday BBQ. Deep breathes. This recipe was long. Many steps. Many bowls. Lots of mixing. I had just over 4 hours, so that seemed like just enough time. I was going to do this recipe by the book too. None of my normal shortcuts or ignoring of steps that I found to be tedious and likely unnecessary. So, I bought cake flour, as that's what it called for. The flour, leavening agent and salt also called to be sifted. Fine. I had a sifter. From my grandma even. So, I sifted away.
So. Time. Consuming.
Sifting the flour and dry ingredients
Now, you know a recipe is special (or "special", depending on how you look at it) when the lemon zest is not merely added to the batter, but massaged into the sugar. Yes, I had to massage the lemon zest into the sugar until the sugar was fragrant. Well, that's some spoiled sugar if you asked me!

Lemon zest about to be rubbed into the sugar until fragrant
Now, here's a step I recognized. Butter gets creamed into the sugar. Not margarine though. I went out and bought about 3 sticks of real butter. My grandma LOVES butter. If there was a word that meant more than love, I would use it. She cuts little pieces of the stick and eats them like that. She gets upset with us when we are over making a sandwich and we don't spread butter on the bread first. She uses it to cook with. She makes the most amazing brown butter bread crumbs for cooked cauliflower with it. She is from the old country as well, Poland. Back then, food was different. Chemicals weren't added to flavour foods. Meat wasn't injected with hormones. Pesticides, herbicides, and genetically engineered food wasn't rampant. Most importantly, people cooked with whole foods. These whole foods were also very pure. We just don't have that luxury today. Babcia swears that all the food now is tasteless. That all meat has the same flavour. I am inclined to believe her. So, knowing all of this, I wanted to bake her a cake and make her ice cream with the purest ingredients that I could.

Real butter, softened to room temperature, in the sugar mixture
True to my word of "following orders", I used the hand mixer while slowly adding in 1/3 of the dry ingredients, then half of the egg mixture, then 1/3 of the dry, rest of the eggs, and last of the dry mix. So much blending now. Phew!

Final batter, being blended for the required time of too long!
After all of my careful diligence to follow the instructions exactly as they are printed in the cookbook, my confidence was wavering. Hmm. I have cooked and baked a lot and typically if something is off, I can tell. The batter looked off. It almost looked like it was curdled. Now I was getting a little concerned. Was this normal? I checked back in the book to see if in any of the 3 pages of this recipe there was a warning that this might or would happen and not to panic. Nothing. Activate panic mode. Wait, think, think, there is always a logical explanation. Well, there was buttermilk in this recipe, and lemon zest. maybe the acidity from the small amount of lemon juice in the zest was enough to curdle the buttermilk a little, in which case, this wouldn't affect the baked product. There was nothing I could do now but dump the batter into pan number 1 and hope for the best.

Cake batter for 2, 9" round cake pans
Something else I should explain about how lengthy this cake making process became. The 9" round pans needed to be greased, with a round wax paper cut-out placed on the bottom of the pan, then greased as well. I got C to look after that for me. However, he brought to my attention that the sides of my one really good 9" round pan were straight, and the other pans edges were ever so slightly fluted, so if I used one of each, the cake layering would look less than perfect. Fine. So that meant that each cake layer needed to be baked separately, due to lack of pans, for 30 minutes each. What made this much worse though, was after the first cake came out of the oven and went onto the cooling rack, it was obvious that the 2 layers of cake which Dorie says will be cut in half and frosted in between would never produce a cake as tall and monumental as the one she showed in her pictures of "The Perfect party Cake". I was in panic and upset mode now. There was such limited time and this cake was turning out to be a disaster! The time lost wasn't even the point. If this cake wasn't up to or exceeding my grandma's standards, then I would consider this a hugely sad failure to disappoint her on such an important birthday. C grabbed the reins of my quickly falling confidence and said that he would go to the store and buy all the ingredients that I would need to make another 2 cakes. I argued with him that I needed more butter, lemon and cream and did he know how long it took to make the first batch of batter, and let's not forget that each cake baked SEPARATELY for 30 minutes. Quickly calculating my timeline, it seemed impossible. He stood his ground and firmly reminded me that I would not be satisfied with a less than perfect cake for this event, told me I was being "difficult" (a word he uses a little too often, I think) and basically told me to suck it up and just do it. So, he went to the store, and I reminded myself that tears would not help my egg whites turn into meringue.

Egg whites being whipped into submission
Deep breathe and back to the never ending whisking and mixing. Egg whites get whipped into glossy smooth meringue for the frosting, then, the secret ingredient gets added to make it perfect buttercream. Butter. Did I mention how much my grandma loves butter and how much of it is in this recipe? That fact alone should produce a tasty dessert. Once again though, disaster began to arise. The buttercream wasn't looking so smooth and white anymore. It seemed clumpy, oily and thick. This can't be right?! I swear this cake was going to give me a heart attack with all of the panic-inducing moments! I decided that the only thing to do was to keep mixing it with the beater and hope for the best again. It came together a bit better, but I wasn't convinced. I tasted it and felt disappointment running over my tongue. I asked C to taste the lemon buttercream because I am not the best judged mixing. Egg whites get whipped into glossy smooth meringue for the frosting, then, the secret ingredient gets added to make it perfect buttercream. Butter. Did I mention how much my grandma loves butter and how much of it is in this recipe? That fact alone should produce a tasty dessert. Once again though, disaster began to arise. The buttercream wasn't looking so smooth and white anymore. It seemed clumpy, oily and thick. This can't be right?! I swear this cake was going to give me a heart attack with all of the panic-inducing moments! I decided that the only thing to do was to keep mixing it with the beater and hope for the best again. It came together a bit better, but I wasn't convinced. I tasted it and felt disappointment running over my tongue. I asked C to taste the lemon buttercream because I am not the best judge of taste for all full-fat foods, especially when I am rilled up. C's eyes rolled back and he declared that it was amazing. I assumed that he was lying to make me feel better, but it worked.

The secret ingredient in buttercream. Shhh!
I warmed the seedless raspberry jam so it was spreadable and began assembling the cake layers. Four layers, 2 batter recipes, and each one was secured together with a thick layer of lemon vanilla buttercream and jam. Some wooden BBQ kabob sticks went through the layers to hold them all together. I packed up the leftover buttercream that would be used to do the sides and the top, the sweetened shredded coconut, the hand mixer, candles, serving utensils and wrapped up the cake. It had a 45 minute car ride now to my uncle's place, and it was 30 C outside and sunny. Had I more time, I would have stuck the cake in the freezer for a bit to ensure that nothing slid around but there just wasn't time. We turned the A/C on full blast, I held the cake on its stand on my lap, and off we went!

Layering vanilla cake with lemon butter cream and seedless raspberry jam
Miracle of miracles and without following any trends from the cake making, the cake arrived unscathed at the party. My grandparents weren't there yet so before saying hello to anyone, I got down to the last bit of business. I spread the butter cream around the sides and top of the cake. Just enough to do it. Then, making a huge mess on my uncle's counter and floor (which I cleaned up afterwards, thankyouverymuch), pressed handfuls of sweetened shredded coconut to the sticky butter cream to finish the effect of a fluffy, white, perfect party cake. I must admit that for those that didn't have the pleasure of witnessing the labour that went into the creation of this special dessert, the final product was definitely something to behold. Tall, elegant, and majestic, this did indeed look like The Perfect Party Cake. When it was time for dessert, we would all find out.


Dorie's Perfect Party Cake, completed


Monday, August 22, 2011

The Healing Power of Ice Cream

Thursday evening my parents stopped by the house to drop off some flowers for C and for his family as well as to pick through some more of the limestone rocks that we hauled out from the basement. During the digging of the foundation footings, some huge pieces of limestone cracked off from the existing wall and had to be broken up so we could physically carry the pieces outside. The rocks are actually quite beautiful so instead of just chucking them in the trash, my mom and I are going to use them in our yards for landscaping.

I still hadn't made the ice cream for my grandma's birthday since the week had been pretty hectic and so my dad offered to help me make it that evening and I took him up on that offer. It's always nice to have a loved one in the kitchen when you need a shoulder to lean on. I had originally planned to make a cherry vanilla ice cream, but then, after some thought, decided to do a chocolate malt ice cream with chunks of chocolate. Since the cake was a vanilla lemon raspberry, it seemed a better choice to stand out from the cake. So now, down to business. 

The first step in making this ice cream was to prepare the chocolate malt flavour. I whisked up chocolate malt powder into some whole milk and let that sit. I found the chocolate malt powder in the ethnic food aisle at Superstore, not with the chocolate milk mixes. I had bought Ovaltine a couple weeks ago, thinking that it would taste like chocolate malt. Not even close! Let me tell you, the taste was disgusting! What I was hoping for, was the taste of a chocolate malt, like from the Malt Shoppe that used to be at St.Vital Mall before it was redone, and at The Bay downtown. Mmm, Homer Simpson drool...
Chocolate malt powder in cream
With the cream mixture off to the side, I had to make an egg custard base (French style). I adjusted the clip on the candy thermometer so that it could sit on the edge of the pot without touching the bottom of the pan. I whisked together the egg yolks and set them aside. Then, whole cream was put into a pot to simmer until steaming, without reaching a boil. The hot cream needed to get mixed into the eggs, without cooking them. Tempering the eggs is so critical in this recipe since nobody wants bits of scrambled egg in their ice cream. Well, not this lady anyways.
We tempered the eggs without problem (you achieve this by slowly adding 1/3 of the hot cream mixture to the eggs, all while quickly whisking or using a hand mixer, then slowly pouring in another third, while mixing) then carefully added the mixture back into the pot to heat up to 170 C. While the mixture is reaching the proper temperature, it needs to be whisked the entire time so that no one spot is heated too high at once.

Egg mixture being heated

Whisking the heating eggs and cream - very important!
Once I took the custard mixture off the stove and dumped it into a metal bowl, I noticed that there were some chunks at the bottom of the pan. Hmm. I was concerned that some of the eggs did get cooked before tempering. We poured the custard, even the chunks, into a metal bowl and placed it over cold water that was in the sink. My dad looked a little worried, but I reassured him that it would be ok (even though I wasn't entirely sure). I whisked the custard in the bowl in the water, being careful not to have any water spill over the sides, to try and cool it faster. My dad and I strained the custard through a fine metal sieve and had a taste to make sure that everything was fine. It tasted alright but I was still a little worried. Nothing to do now but wait and see and hope for the best. We put the mixture into the fridge to cool overnight. My parents had all of the rocks that they wanted, we shared some tea, exchanged hugs and said goodnight. We'd see them tomorrow.

*  *  *
Friday. C had to get up early to head out to with the men of the family to prepare the site. I got up early as well and cleaned the house so that it would be tidy for that day. I find a clean and uncluttered house relaxing to be in, and on a tough day, it's even more important to have a peaceful space to come home to. The family ceremony was at 2pm and the later one at 7pm was for everyone to come and pay their respects to the family and hear the sermon. After the ceremony at the site, C and I headed back to his parents place with his brother and we all ate some A&W together, sitting around the kitchen table. Talk was light and we shared some stories, peppered with bouts of thoughtful silence. We were both already tired and C and I decided to go home and change out of our dress clothes and put our feet up for a bit before heading back over. Plus, our little beast needed a pee break too.
I had figured that with the time at home, I would finish up the ice cream, leaving just (just. ha-ha, just a 2 page 4 layer cake recipe that would likely use all of my prep bowls) to make Saturday morning. I find something very therapeutic about throwing myself into a recipe with multiple steps. I think that with the focus and concentration each step takes, that the anxiety or stress loses its momentum within my brain. Cooking is my therapy. In the right circumstances, the right recipe, it's actually a recipe for healing.

With the custard mixture already cold from being in the fridge all night, the next few steps would be fairly straightforward. As per usual, the custard gets poured into the frozen spinning canister of the ice cream maker. My timing so far has been about 20 minutes until the mixture starts to get thicker, with another 5-10 minutes to finish.

Chocolate malt ice cream base
So, with the ice cream maker whirling away, I was free to prepare the rest of what was to be added to the base. Some crunchy bits to add contrast to the smooth creaminess of the base. I had decided on chocolate covered caramel balls and chocolate covered malt balls (both thanks to Superstore's bulk section). Since the ice cream maker instructions suggest to keep any additions to the base to be about the size of a chocolate chip, I had some chopping to do. Oops, one fell of the cutting board...chomp chomp. Oh, that one's not even...chew chew. Ok, and I also shared a couple malt balls with C, so it was fair.

Chocolates to add to the ice cream, about 1.5 cups
Another idea that I had was to swirl something through the ice cream base. I had juggled around a couple of ideas: fudge sauce, caramel sauce, marshmallow fluff... In the end, I decided to go with the marshmallow fluff. I thought that it might be like having a cappuccino with cream.

Marshmallow fluff, from Extra Foods
So, the delicious chunks of chocolate were added to the ice cream maker in the last 5-10 minutes of churning and then it was done. This is the final product. Mmmm! More Homer happy drool sounds proceeded the tasting spoonful. This was by far my favorite ice cream this far. I could have eaten the entire batch, fresh, right there on the couch.

Chocolate malt ice cream with chocolate malt and caramel chunks
Just kidding, I didn't eat the whole batch. I used a spoon to scoop out the soft ice cream from the drum, so that I could spoon marshmallow cream in between layers of the ice cream. I used a plastic ice cream container from my grandma to store the result of this creation.
The last spoonful from the drum, before being added to a freezer container
The final ice cream. Chocolate malt ice cream with swirls of marshmallow fluff and chunks of chocolate covered caramels and malt balls. BEST. ICE CREAM. EVER. David Lebowitz was right. This was the one ice cream of all the ones that he gave away, that he didn't give away. My family is lucky that I am alright at sharing. So, into the freezer it went. After a few tastes of course. I mean, I had to be sure that this was perfect. Om nom nom!
We'll see what everyone else thinks tomorrow.

Fresh homemade chocolate malt ice cream


Sunday, August 14, 2011

Ice Cream Attempt #3

Last week I was feeling pretty calm and confident and I knew that I had an evening along so I decided to take on ice cream. Real French ice cream. There are technically 2 styles of ice cream. French and Philadelphia style. French refers to ice cream in which an egg custard is made as the base of the ice cream. Philadelphia style just incorporates the ingredients into the ice cream maker to be chilled. So, when you see something called French Vanilla, it's not the type of vanilla or flavouring, but the way the ice cream was prepared and should contain eggs. I picked my test recipe. Vanilla cheesecake. I had bought fresh ripe cherries and was going to try blending those in as well. I also had sugar-free pound cake in the freezer that I bought when it was half off (my goodness, is it ever expensive to buy from Safeway otherwise!) for a future reduced sugar trifle.
Ice cream recipe
I read through this recipe a number of times before starting the process. Since custards I know to be a precise art, despite never having made one before, I wanted to be prepared. Ingredients out and at room temperature, tools and whisks at the ready, my ice bath in the sink waiting...
The first step was blending the cream cheese with the cream. 35% whipping cream, in fact, so I chose the reduced fat cream cheese. Maybe once I master ice cream, I'll feel confident enough to start improvising more on the ingredients and fat contents of each ingredient, but not just yet.
Cream cheese base
Now, this mixture goes into a saucepan to heat up, but I decided that before I did that, I would get the eggs prepped and ready so I wasn't doing 2 things at once. I had time so no sense in rushing myself. Eggs went into a metal bowl and with my new hand mixer, I blended them until they reached a delicate pale shade of yellow. Half of the sugar also went into this mixture so I wanted to be sure that it was very well incorporated.


Eggs, being whipped until light yellow and slightly thickened
 Now came the fun part. The precision part. This is when I like to be alone in the house while I am cooking. Full concentration. I feel like a chemist, pouring over some hair-brained experiment, being careful not to blow up the house. The cream mixture is now supposed to reach a simmer on medium heat. This means that steam will begin to rise from the liquid, but it should not boil. A careful watch is needed here. As soon as the mixture simmers, it should be taken off the heat, with a hand mixer at the ready. This is why I prepped the eggs ahead of time now... So, now you must temper the eggs. In the end, what needs to happen is that the eggs need to also be part of this cream mixture and simmering, as it's going to be the thick custard base for the ice cream. But, what would happen if you just dumped in the eggs, or heated eggs over the stove? Scrambled eggs, that's what. While I am a relatively adventurous ice cream eater, eggs are not going to be in my top 10 must try list. That is where tempering comes in. It means that you slowly raise the temperature of the eggs, slowly enough and with enough movement to keep the temperature rising slowly, that they do not cook, but instead bind with the other yummy fats and create a custard. How I did this with wonderful results was to turn on the hand mixer and start beating the eggs again, while pouring a steady but slow stream of the hot cream mixture into them, making sure they were well incorporated. After about 1/3 of the hot mixture was added, the eggs were tempered and now I put the cream saucepan back on the heat, and poured the tempered egg mix back into that pot. Now, I could raise the heat of the custard mixture, to create the creamy thick base I was looking for.

Cream mixture with tempered eggs added
Hard part number one done. Hard part number two coming up next. While many books suggested that I go by sight and timing (about 6 minutes) for the next step, which is bringing up the temperature of the custard mix while mixing it until thickened, I decided to use the thermometer method this book suggested and also time it. I have a candy thermometer that I have never used to make candy with (although I see that being a soon-to-be-tested experiment) so I had that out and ready. The problem came with attaching it to the pot. I immediately found out that the height of my pot walls wasn't high enough to hold the thermometer without it's tip touching the bottom of the saucepan. Hmm. I knew that this would skew my reading, so I used my spoon rest as an aid and off I went!

Custard mixture at its optimal 170F
Mixing the custard base as the temperature slowly rose, being careful not to scorch the milk. Finally, at 170 F, I did the spoon test. For a perfect custard, a wooden spoon dipped into the liquid should hold a firm trail if you swipe your finger down the centre of it. So, spoon dipped in, finger traced a line down the spoon, and the line remained, so it was done. Off the heat to cool. To speed up the cooling process, one if the ice cream books recommends using an ice bath. I had this ready to go. I filled the sink with cold water and the rest of the bag of ice that C was using for his drinks (sorry, hubs) and sat the metal bowl on top of the water, careful not to get any into the custard, and then whisked and whisked until the custard was cooled. Then, the custard went into the fridge for one more hour, just to be sure.

Custard: wooden spoon finger trace test
After an hour, I set up the ice cream machine and immediately poured in the chilled cream cheese custard. After about 20 minutes, the mixture was firming up in the frozen bowl.
Cream cheese ice cream base
I chopped up some ripe cherries, cursing that I didn't have a cherry pitter and trying carefully to not get any of the blood red juice on myself. On the wooden counter, yes, that was inevitable, but I kept wiping it up. It honestly looked like a scene from Dexter, if Dexter investigated vegan murders.

Cherry massacre of 2011
I chopped up the pound cake and before the ice cream was at its thickest consistency, carefully dropped in the add-ins and was sure to use a knife to push down the fruit and cake, lest it spill over the top. Another 5-10 minutes churning and it was done.

Fresh cherry cheesecake ice cream
I gave C a spoonful to try fresh (which is really the best way to eat it since it gets much harder than commercial ice cream once frozen and needs 10 minutes on the counter, at least, before serving) and his eyes rolled back into his head and his body sighed and pitched, and he gave me a huge hug and told me he loved me. He declared it the best ice cream ever and proceeded to scoop out what I missed from the frozen drum and lick it all up. So, test number 3 was a hit. Very cheesecake tasting. The cherries got a little icy in the freezing as they were fresh and full of juice. The pound cake added a perfect soft and chewy texture to the silky base. I was going to make this for my grandma's birthday but I am debating doing a French vanilla base and using maraschino cherries instead.